The Best Podcast Setup For Beginners in 2025: Complete Guide
Introduction: Your Podcast Journey, Simplified
The best podcast setup for beginners requires just three essentials: a USB microphone (Shure MV7+, Røde PodMic USB, or Amazon Basics depending on budget), wired over-ear headphones for monitoring, and free recording software like GarageBand or Audacity. Combined with a quiet recording space, basic microphone placement techniques, and a podcast host like Spotify or Buzzsprout, beginners can produce professional-quality podcasts without expensive equipment or technical expertise.
Effortless Podcast Setup for Beginners: Get Started Without Tech Headaches
Starting a podcast can feel like an exciting leap into a new creative world, but it’s often accompanied by the daunting shadow of technical complexity. The endless lists of gear, confusing jargon, and the fear of poor audio quality can paralyze aspiring creators before they even hit record. The good news? It doesn’t have to be this complicated. The modern podcasting landscape is filled with user-friendly tools designed to get your voice heard without requiring an engineering degree. With a massive 66% of individuals aged 12-34 in the US consuming podcasts monthly, there has never been a better time to share your passion. This guide is your roadmap to a simple, effective, and truly effortless podcast setup.
Tech Jargon and Overwhelm
The journey into podcasting often begins with a bunch of intimidating terms: XLR, audio interface, condenser vs. dynamic, bitrates, and sample rates. This guide cuts through that noise. Our focus is on practical, plug-and-play solutions for your first podcast setup that deliver excellent sound quality without a steep learning curve. We will prioritize simplicity and efficiency, allowing you to produce a professional-sounding show with minimal gear and investment. The goal is to spend less time troubleshooting and more time creating compelling content. In case we need to use some jargon, though, here is a quick reference guide.
XLR – A type of cable that connects professional XLR microphones to audio gear for stronger, cleaner sound.
Condenser Microphone – A mic that is very sensitive and picks up detail, often used in studios. It can be a USB or an XLR microphone.
Dynamic Microphone – A mic that is less sensitive, better for reducing background noise, and good for live or home use. It can be a USB or an XLR microphone.
Pop Filter – A small screen placed in front of the mic to reduce “popping” sounds from hard letters like P, B, and T.
Audio Interface – A box that connects your microphone to your computer and improves sound quality.
Mixer – A tool that lets you adjust the loudness of voices and sounds before or during recording.
Recorder – A device that stores your audio so you don’t need a computer to capture it.
Boom Arm – A movable stand that holds your microphone in place and keeps your desk clear.
Shock Mount – A mic holder that reduces vibrations and bumps from being picked up in your recording.
Soundproofing Panels – Fabric or foam panels on walls that reduce echoes and background noise.
What "Effortless" Truly Means for Beginners
"Effortless" isn't about compromising on quality; it's about achieving great results with maximum efficiency. For a beginner, this means a setup that is quick to assemble, intuitive to use, and reliable every time you press record. It means your tools work for you, not against you, allowing your primary focus to remain on your message and your audience. An effortless setup removes the technical barriers, transforming podcasting from a daunting task into an enjoyable creative outlet.
The Absolute Essentials for Your First Podcast (The "Minimal Viable Setup")
To begin your podcasting journey, you don't need a studio full of expensive equipment. You only need a few key items. This "minimal viable setup" is designed to deliver clear, professional sound quality from your very first recording. All the gear we recommend in this article is great equipment for beginners.
The Heart of Your Sound: Choosing a Microphone
Your microphone is the single most important piece of gear for your podcast setup. It's the first link in the chain that captures your voice, and its quality directly impacts your final product. For beginners seeking an effortless experience, a USB microphone is the undisputed champion.
Unlike its XLR counterpart, which requires a separate audio interface, a USB mic plugs directly into your computer. This plug-and-play functionality eliminates a major tech headache. A great option is a dynamic USB microphone, as it's excellent at isolating your voice and rejecting background noise, making it forgiving in less-than-perfect recording environments.
We know beginners have a budget to stick to, so here are the top 3 options, at low, medium, and high price points, that we recommend. If you already have a microphone, you don't need to buy a new one, unless you're not satisfied with the sound you are getting from your current mic. As long as you can hear your voice, and there isn't unwanted noise, you're good to go.
High End - Shure MV7+ $299
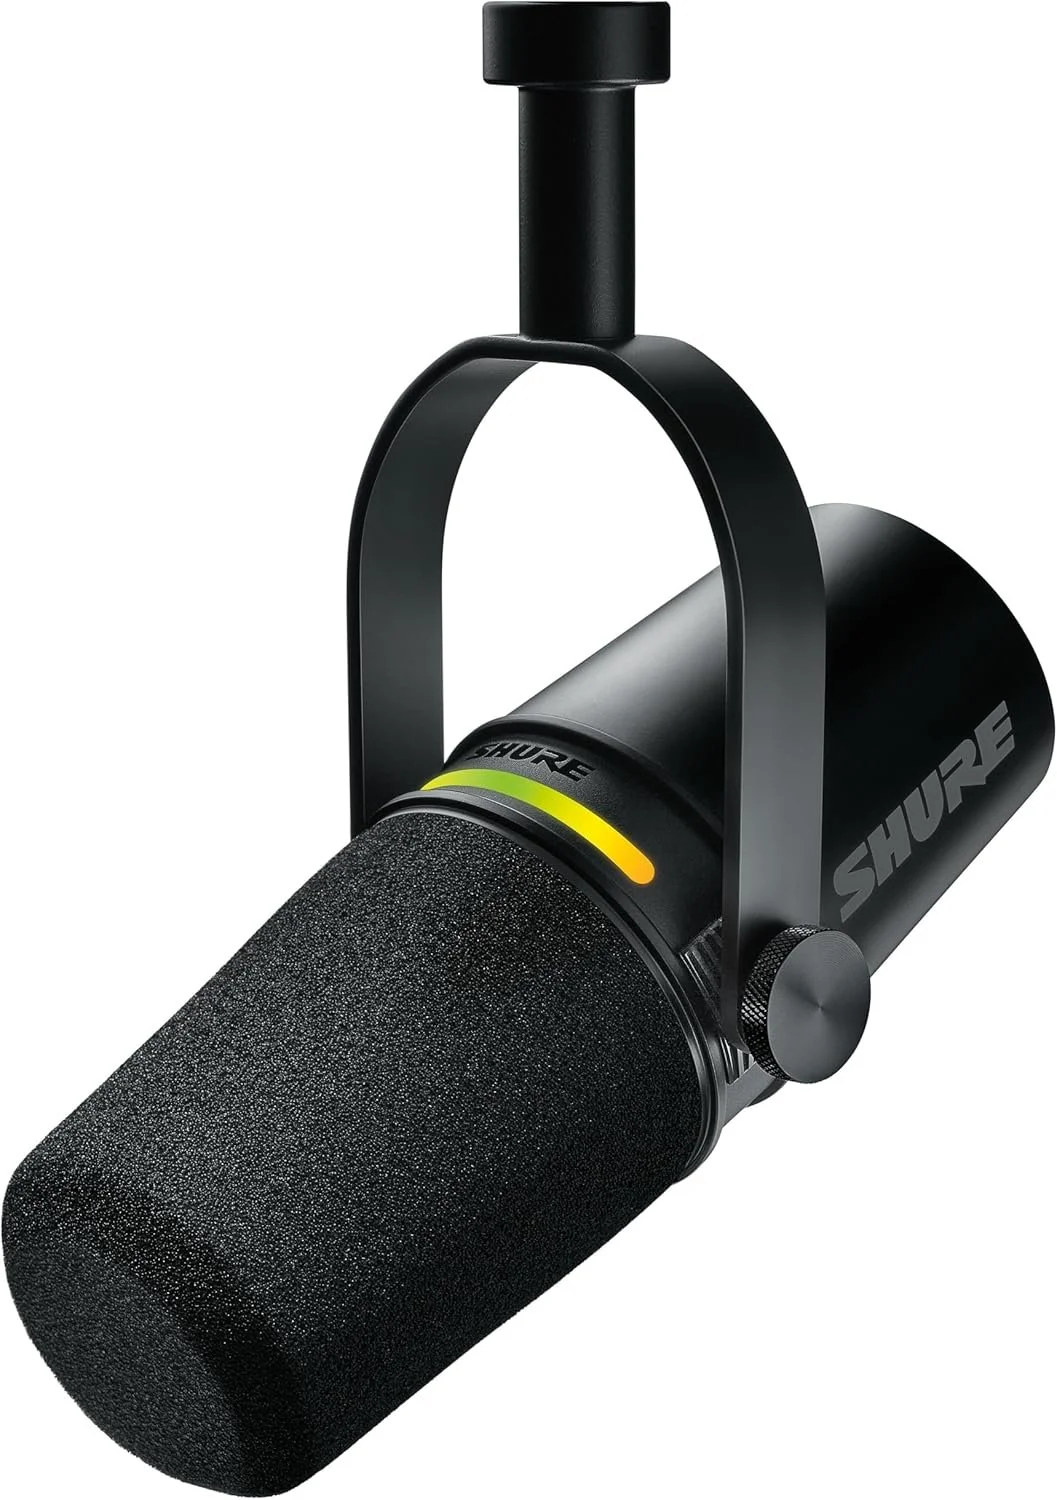
The Shure MV7+ distinguishes itself as an outstanding USB microphone, offering an optimal combination of professional quality and user-friendly design. A key advantage of the Shure MV7+ is a hybrid USB and XLR mic. So, when you're ready to upgrade your system, this microphone is ready to grow with you. This dual connectivity facilitates immediate plug-and-play functionality via USB, while also providing the flexibility of professional-grade recording through XLR. This capability ensures that whether you are a novice or an experienced audio engineer, the MV7+ meets your evolving requirements.
The microphone features advanced voice isolation technology, ensuring your voice remains exceptionally clear, providing a studio sound even in suboptimal acoustic environments. This feature is particularly advantageous for individuals who record in spaces lacking sound treatment, as it minimizes ambient noise and focuses on delivering impeccable voice clarity. It also includes physical and digital pop filters, helping remove unwanted plosives from words with "P", "B", and "T" sounds.
Furthermore, the Shure MV7+ is equipped with intuitive touch panel controls. These enable users to easily adjust gain, monitor mix, and headphone volume, ensuring a seamless experience without navigating complex software interfaces. This focus on user-friendly operation allows you to concentrate on your content without unnecessary distractions.
The build quality of the Shure MV7+ is equally noteworthy, showcasing a robust construction that reflects Shure's commitment to durability and reliability. Its sleek design and compact form factor make it an apt addition to any recording setup.
In summary, the Shure MV7+ offers a compelling mix of professional-grade audio quality, versatile connectivity, and user-centric features. Its ability to deliver clear and focused sound, combined with its robust build and intuitive controls, makes it a premier choice for those seeking a reliable and high-performing USB microphone.
Middle Tier - RØDE PodMic USB $209
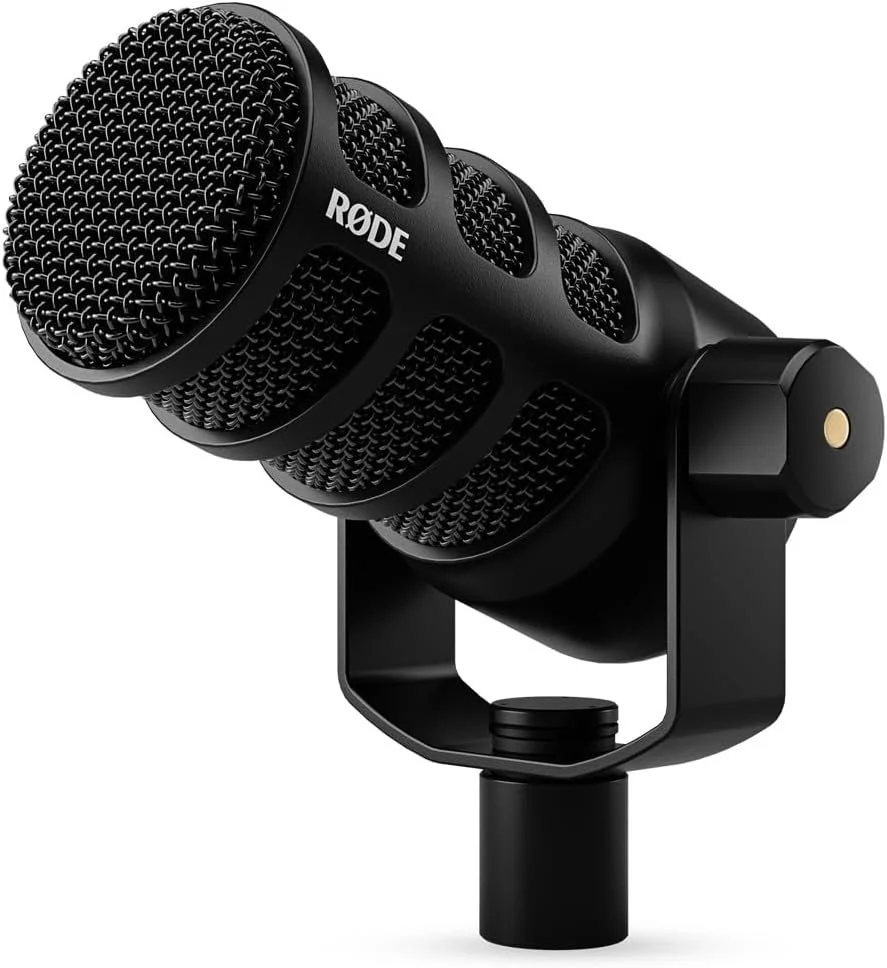
The RØDE PodMic USB is another popular choice for anyone new to podcasting. It provides a combination of quality, ease of use, and affordability that makes it a perfect option for beginners.
The RØDE PodMic USB does not compromise on sound quality. The microphone produces clear and rich audio, capturing voice nuances with impressive fidelity. Compared to the Shure MV7+, it has a slightly thinner sound, but if you don't have a bass-heavy voice, you most likely won't notice a difference. It does a good job of voice isolation; however, it isn't as good as the Shure MV7+. The built-in pop filter is also noteworthy, as it effectively reduces plosive sounds and ensures a clean recording.
It boasts a robust build quality, featuring an all-metal construction that delivers durability and a premium feel typically reserved for higher-end models. This microphone is engineered to withstand the rigors of frequent use, ensuring it remains a dependable tool for users over the long term.
The USB connectivity of the PodMic is a significant advantage, facilitating straightforward computer connections without the need for additional interfaces or complex software. This plug-and-play capability allows users to commence recording almost immediately, making it an ideal choice for those who prioritize ease of use. Like the Shure MV7+, the RØDE PodMic USB also has the option for an XLR connection when you're ready to upgrade
In summary, the RØDE PodMic USB establishes itself as an outstanding entry-level microphone by offering a harmonious balance of quality, durability, and user-friendly features. Its capacity to deliver professional-sounding results without overwhelming beginners with technical complexities makes it a prudent investment for those new to audio recording. Users can rely on the PodMic USB to support their creative endeavors, assured that they have a reliable piece of equipment that will accompany them as they refine their craft.
Middle Tier - Shure MV6 $169

Similar to the MV7+ the Shure MV6 showcases a sleek and sturdy design. But unlike the MV7+, the MV6 is USB only. Its compact form makes it an excellent choice for podcasters working in confined spaces. Crafted with high-grade materials, the MV6 is built to endure the demands of frequent use, offering longevity and dependability.
The MV6's allure is its outstanding audio fidelity. While the MV7 has a more robust sound, the MV6 delivers clear and crisp sound, capturing subtle vocal tones without distortion. This audio quality is particularly advantageous for new podcasters aiming to establish a professional sound profile from the outset. The MV6's cardioid polar pattern efficiently reduces background noise, ensuring the speaker's voice remains the primary focus.
With user convenience at the forefront, the Shure MV6 features a plug-and-play setup that is especially beneficial for beginners. Don't expect as many features as the MV7, but it is intuitive and has minimal setup requirements, enabling users to concentrate on content creation rather than technical complexities.
So, if you want the Shure sound but want to save a few bucks, the Shure MV6 is a great choice.
Low End - Amazon Basics USB Condenser Microphone $26.99
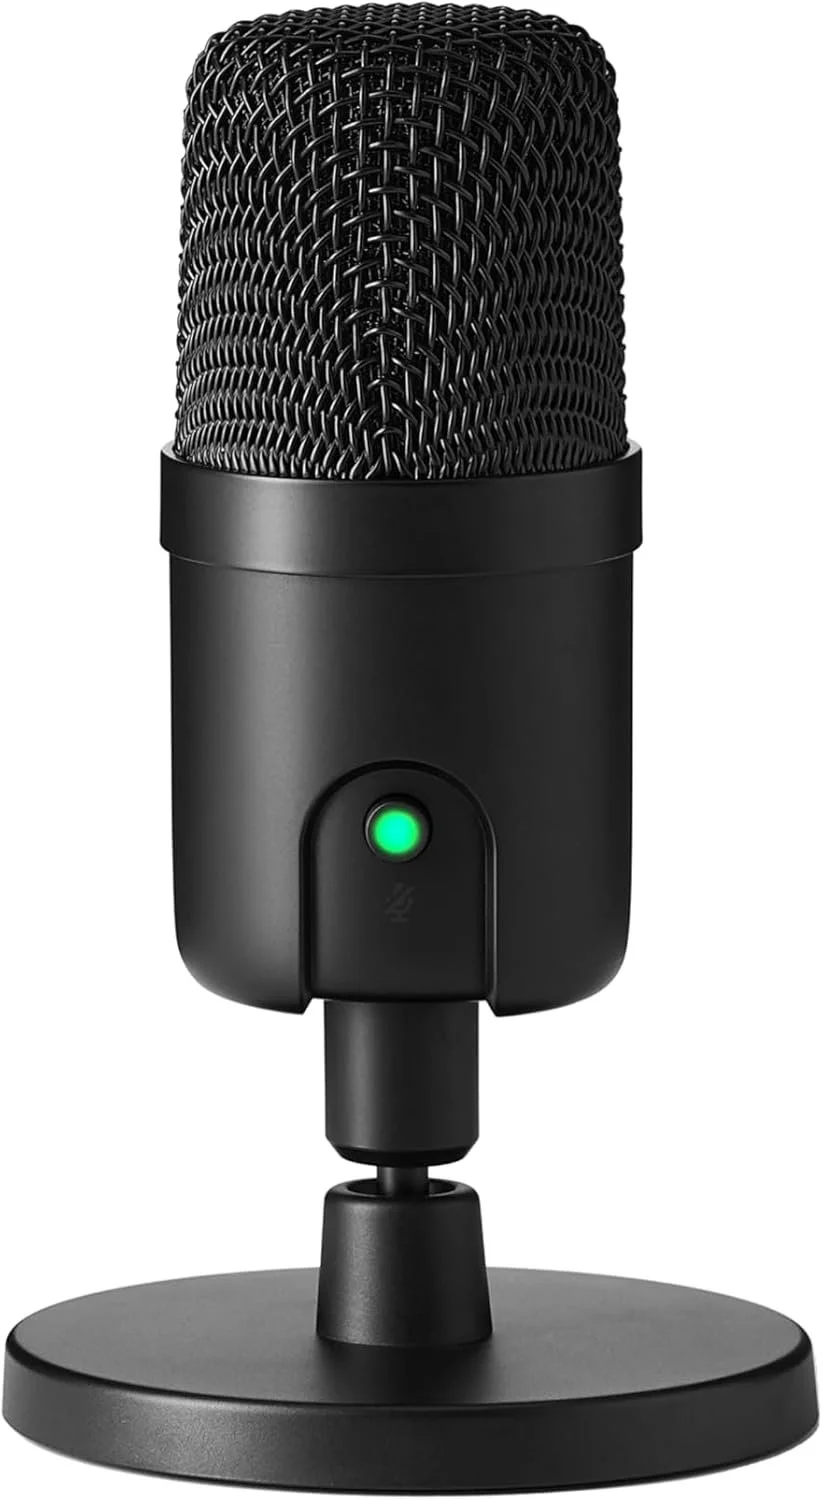
The Amazon Basics USB Condenser Microphone presents a solid entry-level choice for aspiring podcasters who are on a tight budget. This microphone delivers clear audio quality, making it a good starting point for individuals new to podcasting. Its plug-and-play functionality ensures ease of use, allowing users to concentrate more on content creation rather than technical setups.
When compared to more advanced models such as the Shure MV7+, Shure MV6, and the RØDE PodMic USB, the Amazon Basics microphone has some limitations. The Shure MV7+ and MV6 both provide superior audio fidelity and enhanced sound isolation, crucial for professional-grade recordings. Additionally, the RØDE PodMic USB offers a robust build and an integrated pop filter, features that the Amazon Basics model does not offer. When you compare the audio quality of all of these mics, you'll find the Amazon Basics Microphone sounds less professional with a thinner sound. You'll also find that it picks up more of the room tone, so you might need more editing tools to clean the audio up in post-production. This is often a trade-off like this when using equipment for podcast beginners.
Despite these differences, the Amazon Basics USB Condenser Microphone remains a viable option for beginners who value simplicity and cost-effectiveness. It effectively balances functionality and affordability, making it a practical choice for entry-level podcasters.
Hearing Yourself Clearly: Essential Headphones
While a microphone captures your sound, headphones are crucial for monitoring it. Recording without them is like flying blind; you won't hear subtle issues like background hum, plosives (harsh "p", "t", and "b" sounds), or digital distortion until it's too late. For an effortless setup, always choose wired headphones over Bluetooth. Wireless options can introduce a slight delay (latency) between when you speak and when you hear it, which is disorienting and makes real-time adjustments impossible. A simple pair of closed-back, over-ear headphones will isolate sound effectively, giving you an accurate representation of your audio as it's being recorded. You can use any pair of headphones or earbuds you have, but if you don't have a pair, we recommend OneOdio.
OneOdio Wired Over-Ear Headphones $29.99
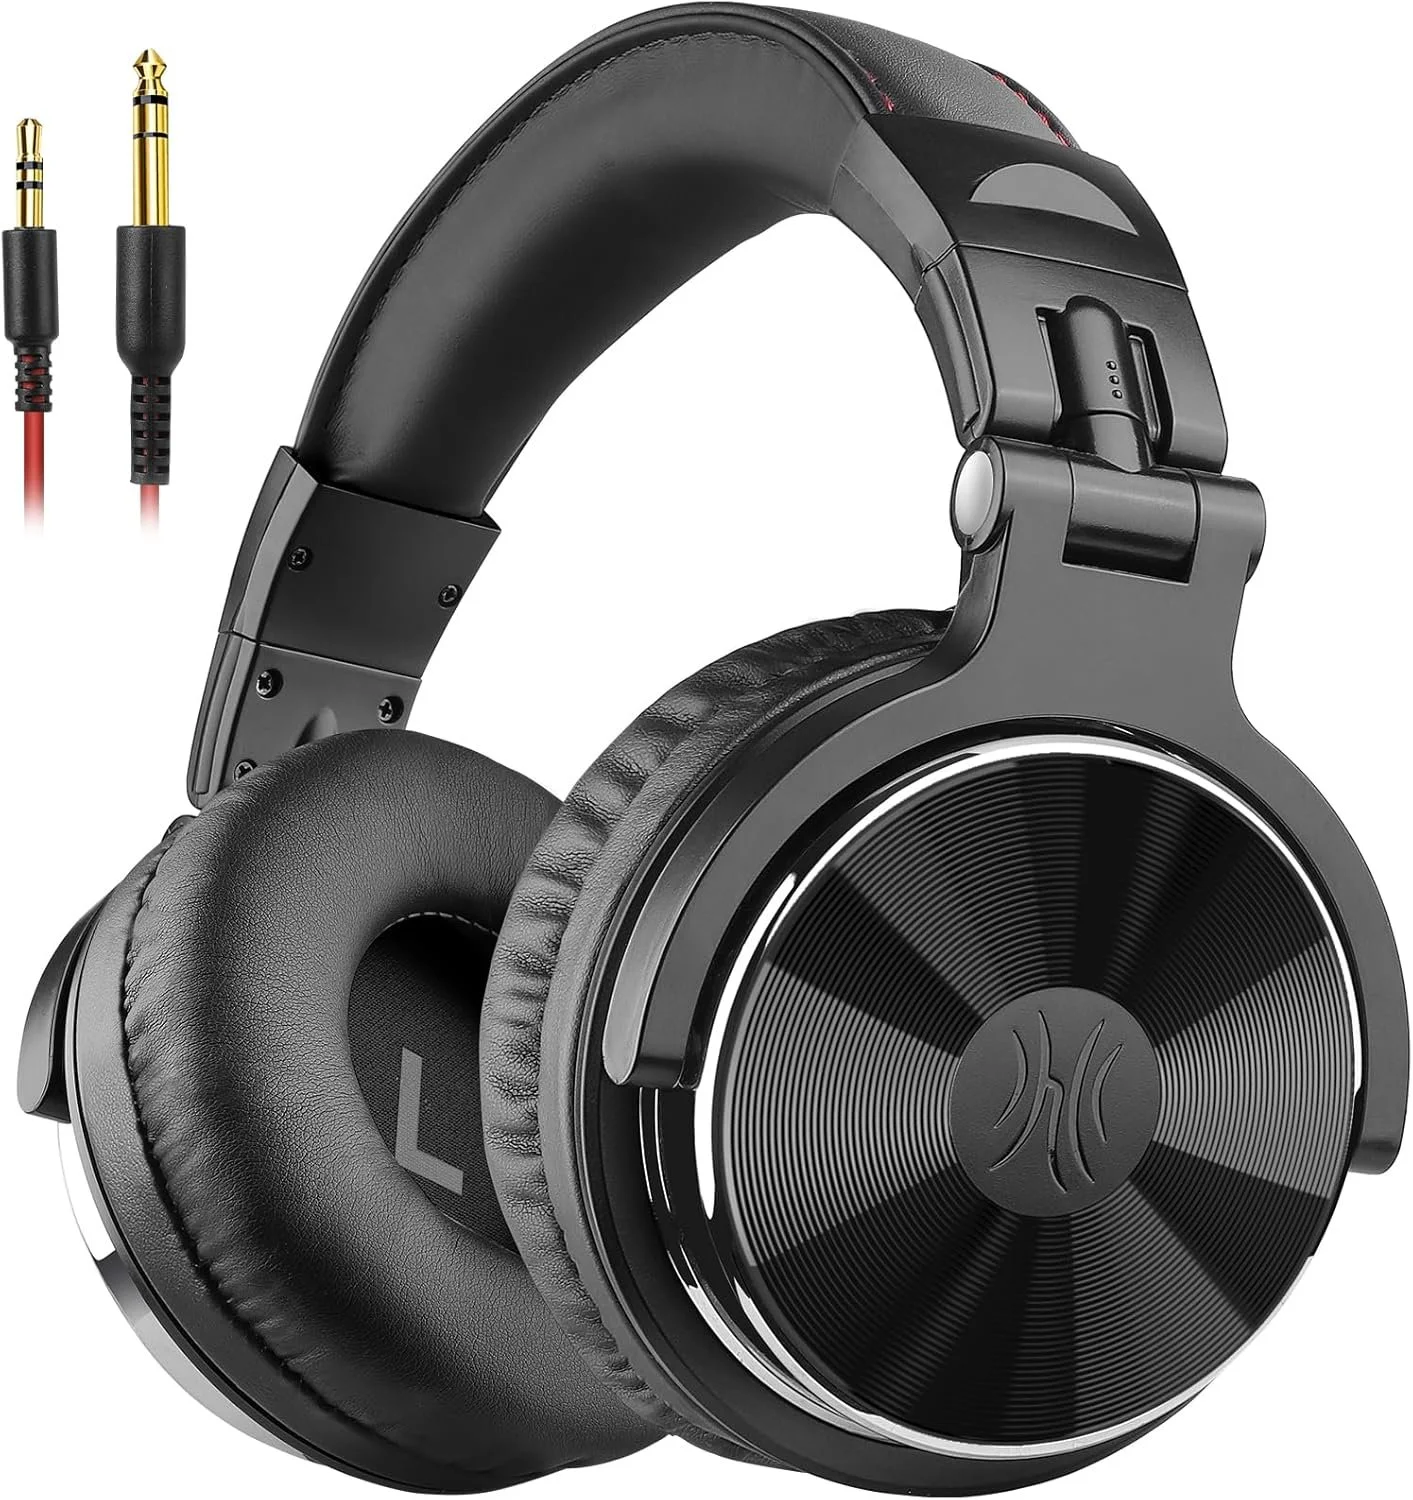
Unlike with microphones, selecting an affordable yet effective pair of headphones focuses less on compromising quality and more on securing reliable performance. The OneOdio Wired Over-Ear Headphones deliver robust sound isolation, ensuring your recordings are heard clearly and precisely, free from external interference. Their comfortable design is ideally suited for extended recording sessions, enhancing productivity by minimizing discomfort. Given their price point, these headphones offer exceptional audio fidelity, rivaling more costly models in clarity and balance. This blend of affordability, comfort, and quality establishes them as a standout choice for aspiring podcasters seeking reliable equipment without exceeding their budget.
Your Digital Workspace: Recording Software That Does the Heavy Lifting
Your recording software, or Digital Audio Workstation (DAW), is where your audio is captured and edited. Many new podcasters are surprised to learn that powerful, intuitive software is available for free. For Mac users, GarageBand comes pre-installed and is a fantastic starting point. For both Mac and PC users, Audacity is a long-standing, powerful, and completely free option. These platforms provide all the essential tools you need to record, perform basic editing, and export your audio file without a complicated interface, making the software side of podcasting truly effortless.
If you want to start with a USB microphone podcast setup, these DAWs will all work just fine. But if you want to use more than one USB microphone during your recording, you might find it a bit complicated. Here is an article that walks through how to do this. To skip these steps, you can use an audio interface like the Rødecaster Pro. Audio interfaces, while more complicated than a USB microphone, still fall under the category of equipment for beginners. The only downsides are that there is an additional cost, and you'll need microphones that are XLR compatible. Here are three affordable audio interface options we recommend.
High End - Zoom PodTrack P4 $169.99
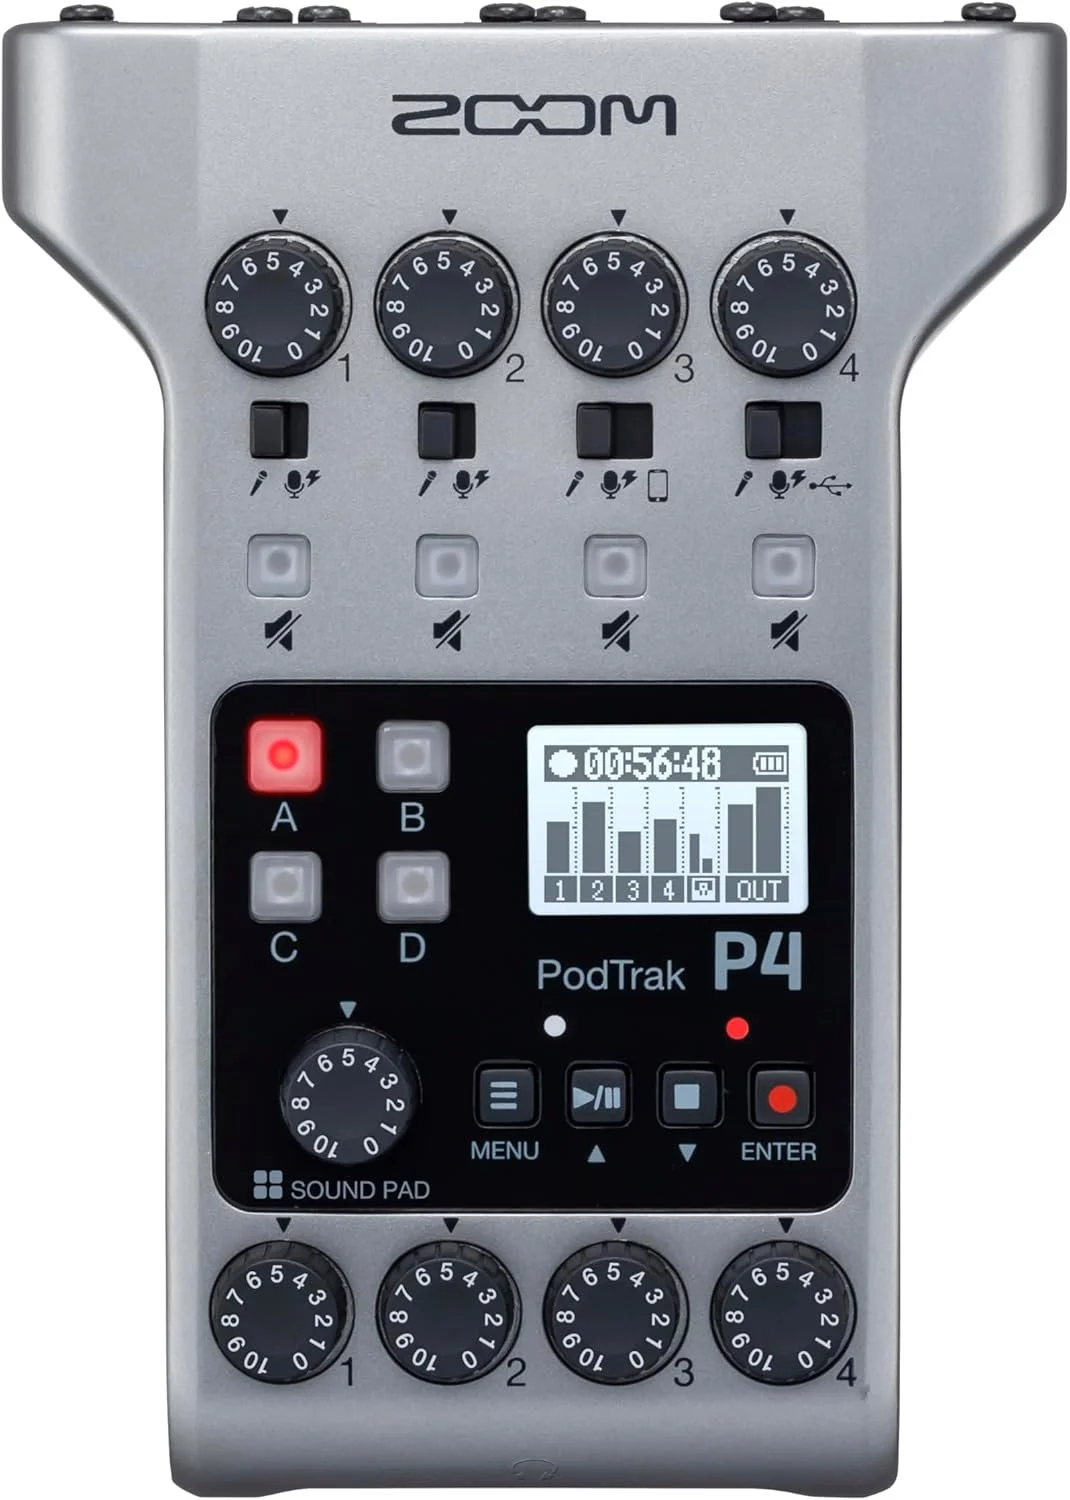
The Zoom PodTrak P4 is a unique selection for newcomers. The smaller brother of the Zoom P8. This device effectively serves two functions: it acts as an audio interface that seamlessly connects microphones to a computer and also operates as a standalone recorder, ideal for mobile podcasting endeavors. Its intuitive layout is expertly crafted with beginners in mind, offering straightforward controls and clear labeling that streamline the recording process. The PodTrak P4 supports four microphone inputs, facilitating flexible recording arrangements, whether for a solo podcast or a multi-host discussion. It has additional features, like being able to patch in a phone call and having four programmable sound pads.
Mid Tier - M-AUDIO M-Track Duo $69

The M-AUDIO M-Track Duo serves as an outstanding choice for podcast beginners seeking an affordable, yet dependable, audio interface to add to their podcast setup. With its straightforward setup and user-centric design, the M-Track Duo allows novice users to concentrate on creativity rather than technical intricacies. Featuring two combo inputs with exceptionally clear preamps, this device ensures high-quality sound capture, making it ideal for aspiring podcasters. Furthermore, the M-Track Duo's robust build and compact size provide convenience without compromising durability, reinforcing its reputation as a premier entry-level option. Its compatibility with popular recording software further enhances its appeal, offering beginners a seamless introduction to the realm of digital audio production.
Low End - XTUGA USB Audio Interface $29.99

The XTUGA USB Audio Interface is a highly recommended option for beginners entering the realm of audio production. Its user-friendly design, along with a straightforward setup process, ensures that even individuals new to audio interfaces can begin with minimal difficulty. The device offers reliable sound quality and essential features that facilitate an efficient recording experience, making it both accessible and effective for novice users. Its build quality isn't as durable as the M-AUDIO M-Track Duo, and it doesn't have as many features os the Zoom PodTrack P4, but it is suitable for beginners looking to get started on a budget.
Setting Up Your Simple Recording Space (Beyond the Gear)
Even the best microphone can't fix a bad recording environment. The space where you record plays a massive role in your final sound quality. Fortunately, you don't need a professional studio; you just need to understand how to control sound in your existing space.
Taming the Room: Quick & Free Sound Treatment Tips
Hard, flat surfaces like walls, desks, and hardwood floors are the enemy of clean audio. They reflect sound waves, creating echo and reverb that can make your recording sound distant and unprofessional. The solution is absorption. Sound treatment panels can be very expensive, but don't worry. You can achieve this for free by choosing a recording space with plenty of soft materials. A walk-in closet filled with clothes is an ideal makeshift vocal booth. Alternatively, recording in a bedroom with a carpet, curtains, and a bed works well. You can even hang a few thick blankets on the walls around your desk to absorb reflections and create a cleaner, more direct vocal sound.
Microphone Placement: Easy Ways to Improve Your Voice
Another way to improve your audio quality is by properly positioning your microphone. This can dramatically improve your audio quality with zero cost. The goal is to speak directly into the mic from a consistent distance. A good starting point is to position the microphone about 4-6 inches (a hand's width) away from your mouth. This captures the richness of your voice without picking up excessive mouth noises or plosives. Podcast beginners will often want to sit farther away from the mic. But if you look closely at any video podcast, you'll see professionals sit very close to the mic. Using a pop filter, a simple mesh screen that attaches to your mic, is highly recommended. Some of the mics we mentioned have pop filters built in. But you can add them to any mic. Neewer Professional Microphone Pop Filter
Your First Recording: Effortless Steps to Capture Great Audio
With your basic tools and space prepared, it's time to capture your first recording. This process should be simple and focused, allowing you to concentrate on delivering your content without worrying about the technology.
Pre-Recording Checklist: Keep it Simple
Before you hit record, run through this quick checklist to avoid common tech headaches:
Close unnecessary applications: Free up your computer's resources to prevent glitches.
Silence all notifications: Phone, computer, and tablet alerts can ruin a perfect take.
Check your mic input: Ensure your software is set to record from your USB microphone.
Do a sound check: Record a few sentences and listen back with your headphones to confirm your levels are good and the sound is clean.
Have water nearby: Stay hydrated to avoid mouth clicks and vocal fatigue.
Recording Best Practices for Beginners
During the recording process, consistency is key. Try to maintain the same distance from your microphone and speak at a steady volume. Don't worry about small mistakes; you can easily remove them during the editing phase. Pausing for a second after a flub can make it easier to find and cut later. The most important practice is to monitor your audio with headphones throughout the entire session. This allows you to catch and correct issues like a bumped mic or an external noise in real-time, saving you significant time in post-production.
Quick Troubleshooting for Common Tech Headaches
Even with a simple setup, issues can arise. Here’s how to solve the most common ones quickly:
No sound from the mic: Check that the USB cable is securely connected to both the mic and the computer. In your system's sound settings, ensure the microphone is selected as the default input device. You may also need to restart your DAW or your computer so that it recognizes your USB microphone or audio interface.
Echoing or "roomy" sound: You need more sound absorption. Move closer to soft surfaces like blankets, or try recording in a smaller, more furnished room.
Loud background noise: Identify the source. Is it a fan, an air conditioner, or a computer? Turn off what you can. A dynamic microphone will also help minimize this.
Post-Production Made Easy: Editing and Polishing Your Podcast
Recording is just the first step. Editing is where you refine your audio, remove mistakes, and assemble your content into a polished final product. For beginners, the goal of editing should be clarity and flow, not complex sound design.
The Magic of Simple Editing (Software Features That Help)
Modern audio software makes basic editing incredibly intuitive. The most common tasks you'll perform are cutting out mistakes, trimming dead air from the beginning and end, and arranging segments. Most platforms use a visual "waveform" that makes it easy to spot pauses or stumbles. Look for simple tools like "Split" or "Cut" to remove unwanted sections. Many programs also offer basic noise reduction features that can help clean up persistent low-level hum, further enhancing your audio quality without requiring advanced skills.
Exporting Your Episode: The Right Settings for Quality
Once your editing is complete, you need to export the file. This step can seem technical, but there are simple standards that work perfectly for podcasts. Export your final audio as an MP3 file. For spoken-word content, a bitrate of 128 kbps in stereo is an excellent choice. This setting provides great sound quality while keeping the file size manageable, which is important for both your hosting platform and your listeners who may be downloading on mobile data.
Sharing Your Voice: Effortless Podcast Hosting and Distribution
After creating and polishing your episode, the final step is to share it with the world. This involves using a hosting service to store your audio files and distribute them to major podcasting platforms.
What is Podcast Hosting and Why Do You Need It?
A podcast host is a specialized service that stores your MP3 files and generates an RSS feed for your show. The RSS feed is a unique URL that contains all your episode information. When you submit this feed to major podcast platforms like Apple Podcasts and Spotify, they use it to find and display your new episodes automatically.
User-Friendly Hosting Platforms for Beginners
Many hosting platforms are designed specifically for new podcasters, offering simple interfaces and clear instructions. Services like Buzzsprout, Libsyn, and Podbean provide user-friendly dashboards where you can easily upload your audio, write show notes, and publish your episodes. They often include helpful analytics so you can see how many people are listening. They also include production tools like Magic Mastering that help your audio sound better with just the click of a button. Look for a platform with a straightforward upload process and reliable customer support to ensure an effortless experience.
But, if you're just starting out, we suggest hosting on Spotify. Spotify is one of the major podcast platforms, and so it makes sense to host directly on their platform. Spotify has great resources to help podcast beginners, and best of all, it's free! If your podcast grows large enough, they even offer monetization features.
Submitting Your Podcast to Major Platforms (Spotify, Apple Podcasts, etc.)
Once your first episode is uploaded to your host, they will provide you with your RSS feed URL. You will then submit this URL to each major directory one time only. Apple Podcasts, Spotify, Amazon Music, and others have simple submission portals. After this initial submission and approval, every new episode you publish on your host will automatically appear on these platforms. It's a "set it and forget it" system that makes distribution seamless.
Another option to consider is posting your podcast directly to YouTube. This would require you to create a video podcast, which we cover how to do step-by-step in this article here. Posting your podcast to YouTube is a great idea in 2025 because YouTube is the most popular platform for podcasts in the U.S. Plus, they offer monetization features when your channel has reached 4000 watch hours and 1000 subscribers.
Beyond the Basics: Simple Upgrades for Your Podcasting Journey (When You're Ready)
Your simple USB setup can serve you well for a long time. However, as you grow more comfortable with the podcasting process, you may want to explore some simple upgrades to enhance your quality and workflow.
Stepping Up Your Microphone Game (Introducing XLR Mics)
When you're ready for a noticeable jump in audio quality and flexibility, an XLR microphone is the next logical step. These are the microphones you see in professional studios, but can easily be used by podcast beginners. An XLR mic requires an audio interface—a small box that connects the mic to your computer and gives you physical control over your volume levels. This option provides a cleaner, richer sound and opens the door to using a wider range of high-quality microphones.
Enhancing Remote Interviews with Ease (Dedicated Platforms)
If your podcast involves interviewing guests remotely, using a dedicated recording platform can make the process effortless. Services like Riverside.fm and SquadCast are designed to record high-quality audio and video locally on each person's computer. This avoids the compressed, glitchy audio common with platforms like Zoom and ensures that both you and your guest sound crystal clear, regardless of internet connection stability. To learn more, you can check out our article comparing Riverside and Zoom.
Considering Video Podcasts (Leveraging Existing Devices)
With video becoming increasingly important in podcast recording, you can start creating video content without a major investment. Your smartphone or a standard webcam can produce excellent video quality for your first video podcasts. Riverside.fm makes recording video podcasts very easy. Recording video alongside your audio gives you more content to share on platforms like YouTube and social media, allowing you to reach a wider audience and deepen your connection with listeners.
Conclusion: Start Your Podcast Today, The Easy Way
The path to launching a successful podcast is not paved with complex technology or expensive gear. By focusing on a few essential, user-friendly tools and sound recording principles, you can create a high-quality show that honors your content and engages listeners from the very first episode.
Recap: Your Effortless Path to Podcasting
Your journey starts with a simple, powerful core setup: a USB microphone for clear audio capture, wired headphones for real-time monitoring, and free recording software. By choosing a quiet recording space and applying basic mic techniques, you ensure excellent sound quality at the source. From there, simple editing, user-friendly hosting, and seamless distribution will carry your voice to listeners around the world. Every step is designed to be straightforward, saving you time and frustration.
Don't Let Tech Fear Hold You Back
The biggest obstacle for most new podcasters is the fear of the unknown. But as we've outlined, the technical hurdles are smaller than ever. The tools are accessible, the process is simplified, and the potential audience is vast and engaged. Your story, your expertise, and your voice are what truly matter. Embrace this effortless setup, focus on creating content you're passionate about, and start your podcasting journey today. The world is waiting to listen.
Frequently Asked Questions
-
Beginners need just three core pieces of equipment: a USB microphone for clear audio capture, wired over-ear headphones for monitoring, and free recording software like GarageBand (Mac) or Audacity (Mac/PC). A quiet recording space with soft furnishings completes the setup. This minimal gear delivers professional-sounding results without overwhelming complexity. Adding an audio interface and XLR microphone becomes worthwhile only after consistent podcasting commitment.
-
The best beginner microphone depends on budget. The Shure MV7+ ($299) offers premium hybrid USB/XLR connectivity and excellent voice isolation. The Røde PodMic USB ($209) provides robust quality at mid-tier pricing. The Shure MV6 ($169) delivers Shure's signature sound at a more affordable rate. The Amazon Basics USB Condenser ($26.99) suits tight budgets. All four offer plug-and-play simplicity ideal for new podcasters.
-
No, you don't need an audio interface to start podcasting. USB microphones plug directly into your computer and require no additional hardware. Audio interfaces become useful when upgrading to XLR microphones, recording multiple guests simultaneously, or wanting precise gain control. Beginners benefit from starting with a USB setup, then upgrading to interfaces like the Zoom PodTrak P4 or M-Audio M-Track Duo as their podcast grows.
-
Improve podcast audio quality at home through three free techniques: record in a small space with soft surfaces (carpets, curtains, blankets) to reduce echo, position your microphone four to six inches from your mouth to capture rich vocals, and use a pop filter to eliminate plosives. A walk-in closet filled with clothes makes an excellent makeshift vocal booth. Sound treatment matters more than expensive equipment for clean audio.
-
Beginners can host podcasts free on Spotify for Podcasters, which provides distribution to major platforms, basic analytics, and even monetisation options once your audience grows. Paid alternatives like Buzzsprout, Libsyn, and Podbean offer more advanced features including detailed analytics and Magic Mastering tools. Most hosts generate an RSS feed automatically, allowing one-time submission to Apple Podcasts, Spotify, and Amazon Music.